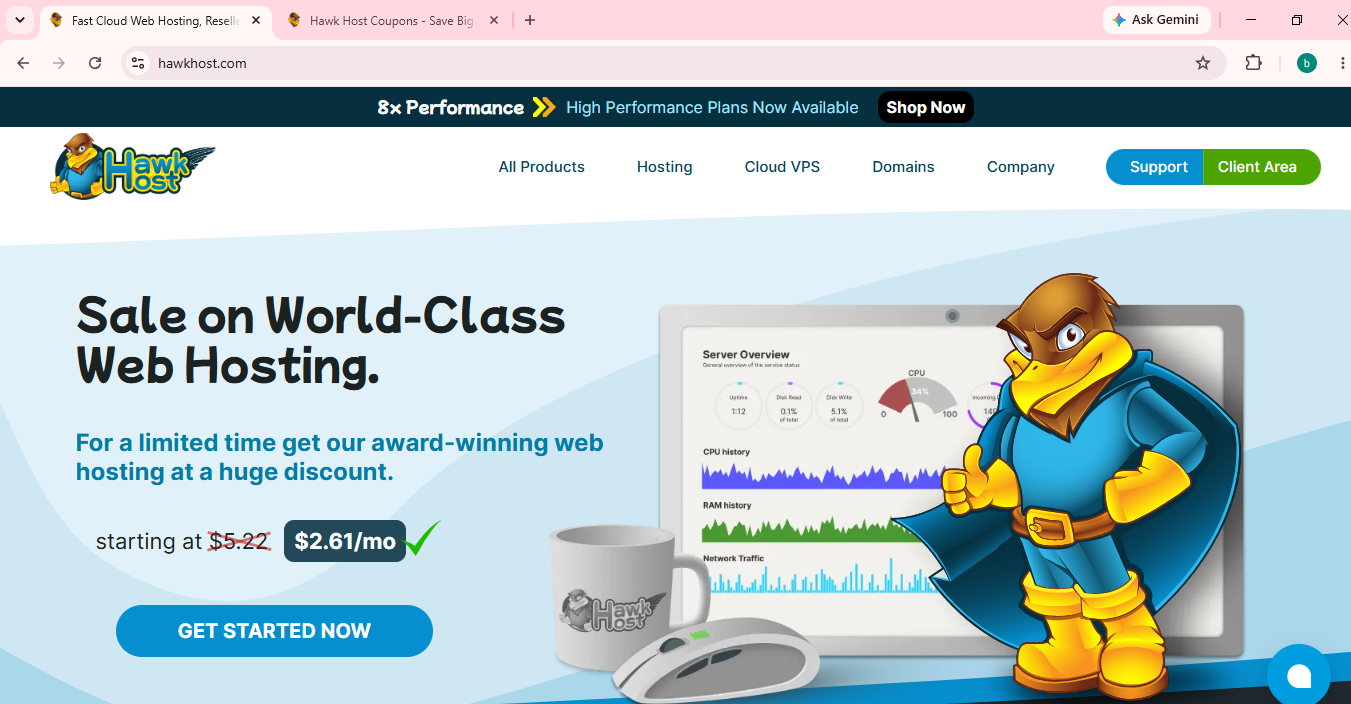
Buying web hosting for the first time can feel confusing, especially if you’re not familiar with technical terms like shared hosting, domain names, or DNS. Fortunately, HawkHost has one of the simplest ordering processes among hosting providers, making it an excellent choice for beginners, bloggers, small businesses, and WordPress users.
In this guide, you’ll learn exactly how to buy HawkHost hosting, what you should prepare before ordering, and what to do after your purchase. By the end, you’ll have your hosting account ready for building your website.
What Is HawkHost?
HawkHost is an independent web hosting company that has been providing hosting services since 2004. It offers affordable hosting with data centers in multiple countries, including the United States, Canada, Singapore, and Europe.
The company is well known for providing:
- Fast LiteSpeed web servers
- Free SSL certificates
- Free website migration
- cPanel hosting
- One-click WordPress installation
- Daily backups
- Affordable pricing
- Responsive customer support
Unlike many large hosting companies that constantly upsell expensive add-ons during checkout, HawkHost keeps the purchasing process simple and transparent.
HawkHost is suitable for:
- Personal blogs
- Business websites
- Portfolio websites
- WooCommerce stores
- Landing pages
- Affiliate marketing websites
- Developers hosting multiple projects
Which HawkHost Plan Should You Choose?
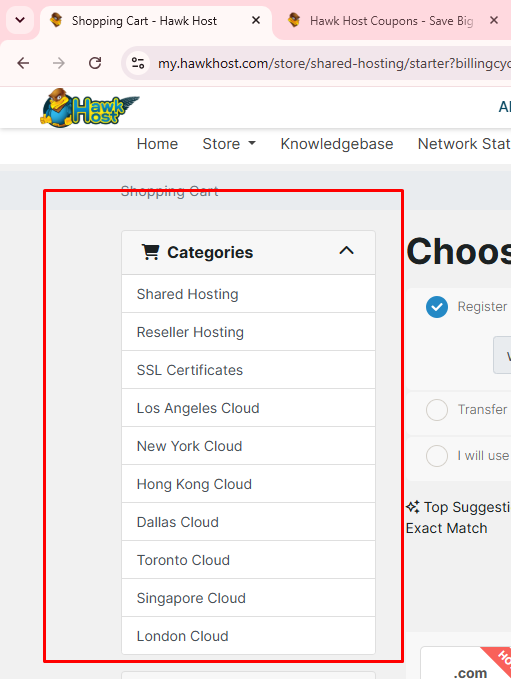
Before placing your order, it’s important to choose the right hosting plan.
Shared Hosting
This is the best option for most beginners.
Recommended for:
- First website
- Blogs
- Small businesses
- Portfolio websites
- WordPress sites
Advantages:
- Lowest cost
- Easy management
- Includes cPanel
- Free SSL
- LiteSpeed server
- Unlimited websites (depending on the plan)
If you’re unsure which hosting type to choose, Shared Hosting is usually the safest option.
Semi-Dedicated Hosting
Ideal if your website receives higher traffic.
Choose this if you have:
- Growing business website
- WooCommerce store
- Busy blog
- Membership website
You’ll receive more server resources than shared hosting.
VPS Hosting
VPS hosting gives you complete control over your server.
Recommended for:
- Developers
- Agencies
- Large websites
- Custom applications
Beginners generally don’t need VPS hosting.
Before You Buy
Preparing a few things beforehand will make checkout much smoother.
1. Decide on Your Domain Name
If you already own a domain:
- Keep it with your current registrar
- Connect it to HawkHost later
If you don’t own one yet:
- Register a new domain during checkout
- Or purchase it from another registrar first
2. Prepare Your Email Address
You’ll need a working email address because HawkHost sends:
- Order confirmation
- Login details
- Invoice
- Support notifications
Use an email you check regularly.
3. Choose Your Payment Method
HawkHost accepts several payment methods.
Depending on your country, available options may include:
- Credit card
- Debit card
- PayPal
- Other supported payment gateways
Make sure your payment method is ready before checkout.
4. Decide How Long You Want to Pay For
You’ll usually see multiple billing cycles.
Common options include:
- Monthly
- Quarterly
- Semi-Annually
- Annually
- Biennially
- Triennially
Longer billing cycles often provide a lower monthly cost.
Step 1: Go to HawkHost
Visit the HawkHost website and click Hosting or Shared Hosting.
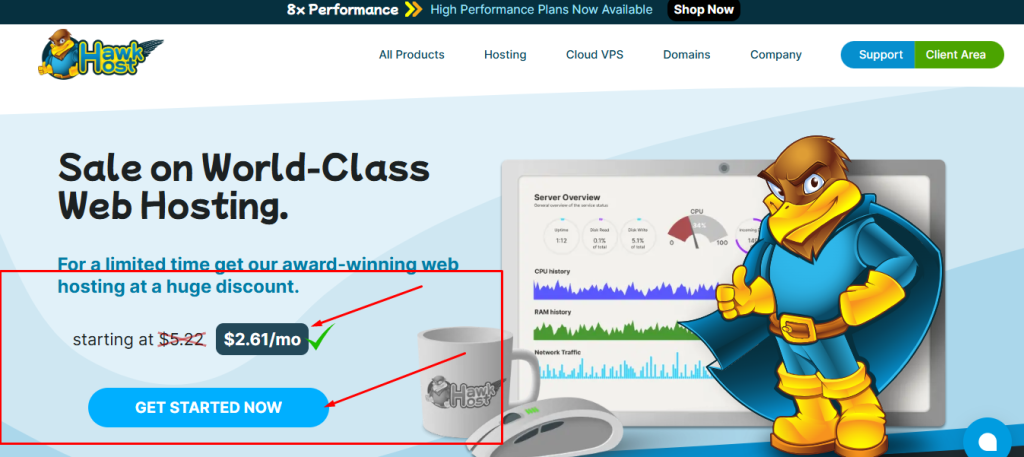
You’ll see the available hosting plans.
Take a moment to compare:
- Storage
- Number of websites
- Features
- Pricing
Most beginners can safely choose the entry-level shared hosting plan.
Step 2: Choose a Plan
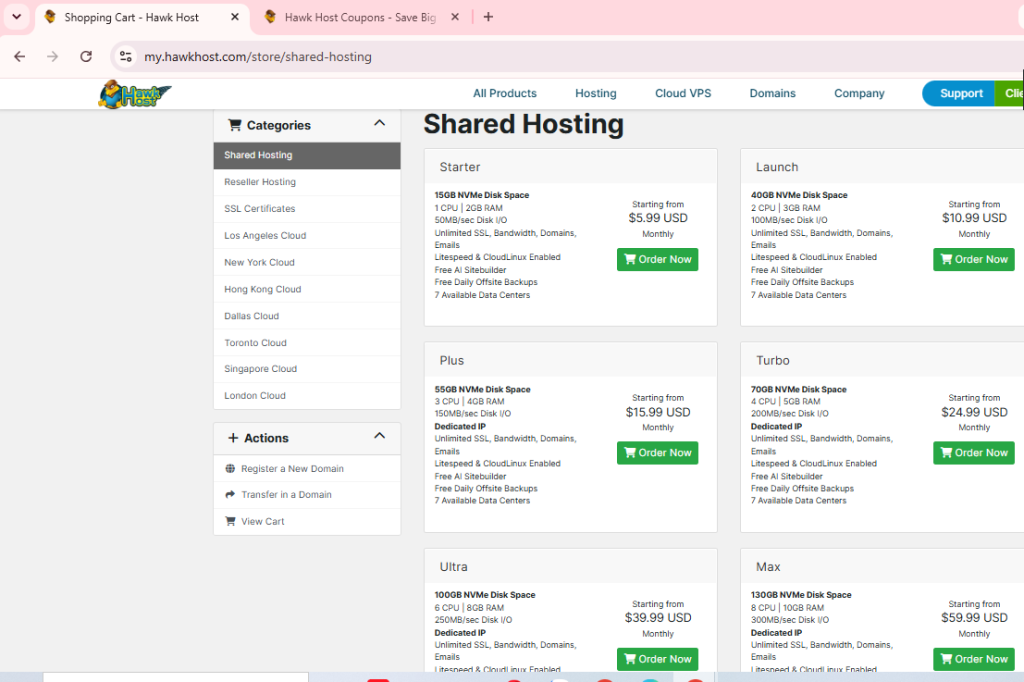
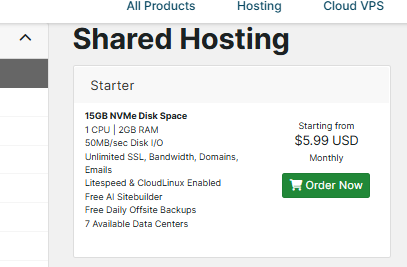
Click Order Now under the hosting package you want.
The next page will ask whether you already have a domain.
You usually have three choices:
Register a New Domain
Select this if you’re creating a brand-new website.
Enter your desired domain name.
The system will automatically check availability.
Transfer an Existing Domain
Choose this if you’re moving your domain registration to HawkHost.
You’ll need your domain’s authorization (EPP) code.
Use Your Existing Domain
If your domain is already registered elsewhere, simply enter it here.
You can point the domain to HawkHost after your hosting account is activated.
Most users select this option.
Step 3: Select Your Billing Cycle
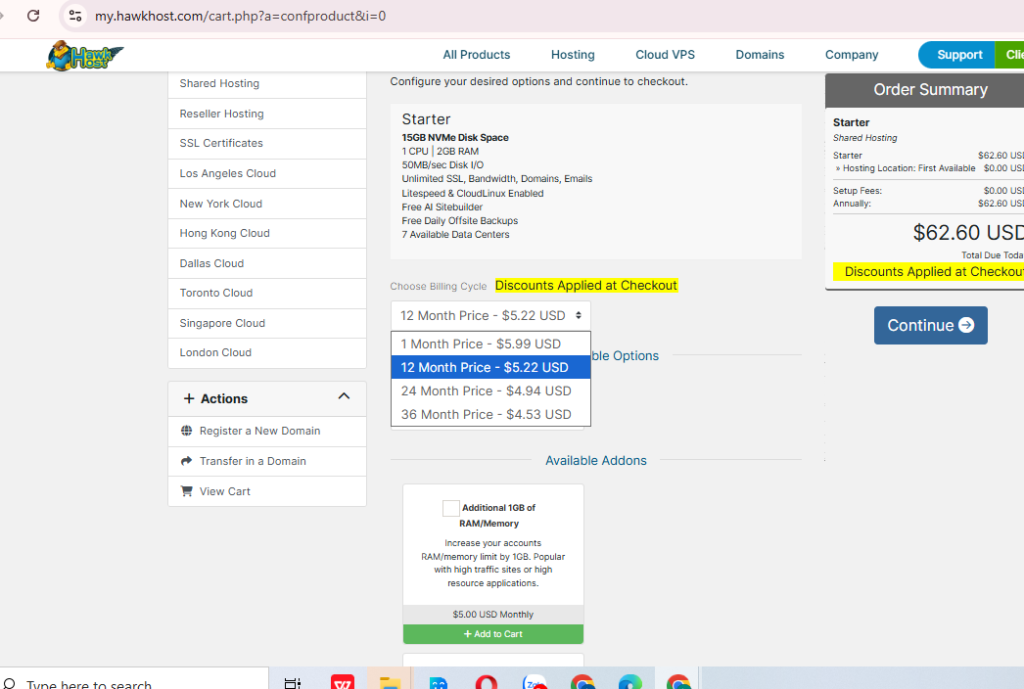
Next, choose how long you’d like to purchase hosting.
Consider these factors:
Monthly
Pros:
- Lowest upfront payment
Cons:
- Higher monthly cost
Annual
Pros:
- Better value
- Fewer renewals
Good for users who plan to keep their website online long term.
Multi-Year Plans
If you’re confident about your project, longer billing periods can reduce the effective monthly cost.
However, beginners who are still testing ideas may prefer annual billing.
Step 4: Enter Your Domain
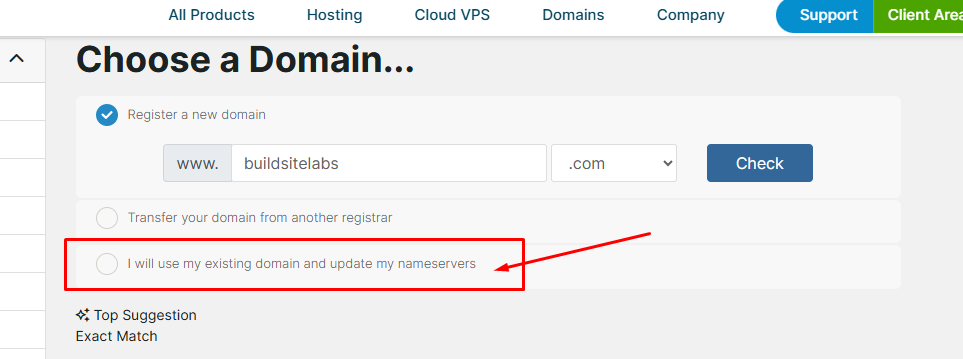
Now it’s time to configure your domain. You have three options:
Option 1: Register a new domain with HawkHost.
Many people don’t realize that HawkHost also offers domain registration, not just web hosting. If you want to buy a brand-new domain directly from HawkHost, choose Option 1.
Option 2: Transfer your existing domain to HawkHost.
If you already own a domain and want to move its registration from another registrar to HawkHost, choose Option 2.
Option 3: Use a domain registered with another provider.
If you already purchased your domain from another registrar, such as Namecheap (which is what I use), choose Option 3. You can keep your domain where it is and simply connect it to your HawkHost hosting account.
If you’re using an existing domain:
Simply enter:
example.comNo DNS changes are needed immediately.
After payment, HawkHost will provide:
- Nameservers
- Hosting account details
- cPanel login
You’ll update your DNS settings afterward.
Step 5: Complete Payment
Now you’ll reach the checkout page.
Fill in your personal information:
- First name
- Last name
- Address
- Country
Double-check everything before continuing.
Next:
Choose your payment method.
Review:
- Hosting plan
- Billing cycle
- Total cost
- Any taxes
If everything looks correct, submit your order.
After payment, you’ll receive:
- Order confirmation
- Invoice
- Hosting activation email
Many accounts are activated automatically within minutes, although some orders may require manual verification.
Step 6: Access the Client Area
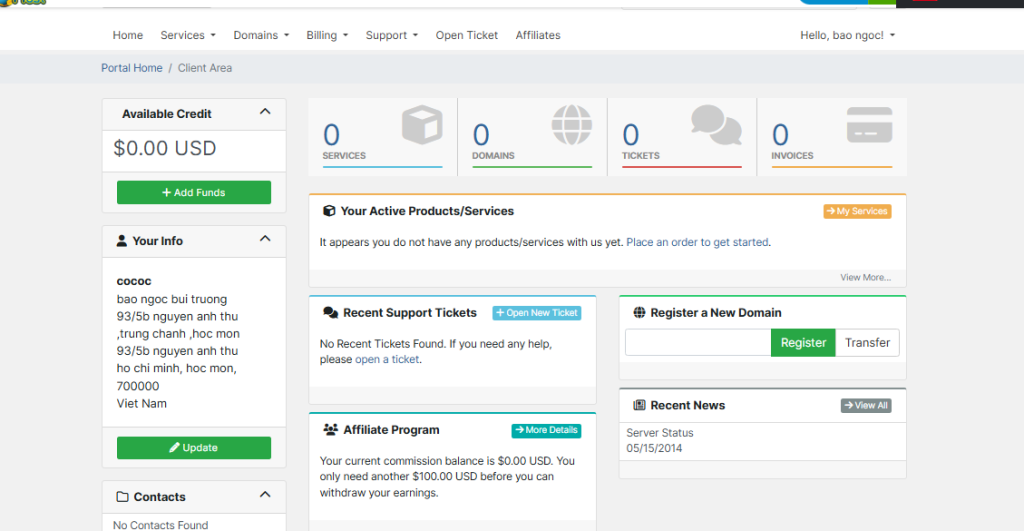
Once your account is active, log in to the HawkHost Client Area.
From here you can manage:
- Hosting services
- Domains
- Billing
- Support tickets
- SSL
- DNS
- cPanel access
This dashboard becomes the central place for managing your hosting account.
Bookmark it for future use.
What to Do After Purchasing HawkHost
Buying hosting is only the beginning. Here are the next steps you should take.
Install WordPress
The easiest way to build a website is by installing WordPress.
Inside cPanel you’ll usually find a one-click installer.
The installation only takes a few minutes.
Connect Your Domain
If your domain is registered elsewhere:
Update the domain’s nameservers using the values provided by HawkHost.
DNS propagation usually finishes within 24–48 hours.
Enable SSL
Most HawkHost hosting plans include a free SSL certificate.
Once activated, your website will use HTTPS.
This improves:
- Security
- SEO
- Visitor trust
Create Professional Email Accounts
Inside cPanel you can create email addresses such as:
Using a custom email looks much more professional than a free email service.
Set Up Backups
Although HawkHost provides backups, you should still maintain your own copies.
Consider installing a WordPress backup plugin or downloading regular backups from cPanel.
Having multiple backups is always a good practice.
Install Essential WordPress Plugins
Recommended plugins include:
- SEO plugin
- Security plugin
- Cache plugin
- Backup plugin
- Contact form plugin
Avoid installing too many plugins, as they may slow down your website.
Common Mistakes to Avoid
Many beginners make these mistakes:
- Buying the wrong hosting type
- Entering the wrong email address
- Forgetting to save login credentials
- Choosing a domain name without checking spelling
- Skipping SSL setup
- Not creating backups
- Waiting too long to connect their domain
Avoiding these mistakes will save you time later.
FAQ
Is HawkHost good for beginners?
Yes. HawkHost offers a straightforward ordering process, cPanel, one-click WordPress installation, and helpful documentation, making it beginner-friendly.
Can I use my existing domain?
Yes. During checkout, choose the option to use an existing domain and update your DNS settings after your hosting account is activated.
How long does account activation take?
Many hosting accounts are activated automatically within a few minutes after successful payment. Occasionally, manual verification may take longer.
Does HawkHost include free SSL?
Yes. Most shared hosting plans include free SSL certificates, allowing you to secure your website with HTTPS.
Can I install WordPress?
Absolutely. HawkHost supports one-click WordPress installation through cPanel, making setup quick and easy.
Which billing cycle should I choose?
If you’re just testing a new project, monthly or annual billing is a good starting point. If you’re committed to a long-term website, longer billing cycles often provide better value.
What if I already have hosting elsewhere?
HawkHost offers free website migration for many hosting accounts, making it easier to move your existing website without rebuilding everything.
Final Thoughts
Buying HawkHost hosting is a straightforward process, even if you’re creating your very first website. By preparing your domain, choosing the right hosting plan, selecting an appropriate billing cycle, and completing the checkout carefully, you can have your hosting account ready in just a few minutes.
After your purchase, remember to install WordPress, connect your domain, enable SSL, create professional email accounts, and configure backups. These simple steps will give your new website a solid foundation and help ensure it’s secure, reliable, and ready to grow.