Logging into your HawkHost account is one of the first things you’ll do after purchasing hosting. Whether you need to pay an invoice, install WordPress, manage your domains, or access cPanel, everything starts with your HawkHost Client Area.
However, many beginners get confused because HawkHost actually has two different login areas:
- HawkHost Client Area
- cPanel
Although both are related to your hosting account, they serve completely different purposes. The Client Area is where you manage your account, billing, and hosting services, while cPanel is where you manage your website itself.
In this guide, you’ll learn how to log in to both the HawkHost Client Area and cPanel, recover a forgotten password, troubleshoot common login issues, and understand what you can do after signing in.
Tip: Bookmark the HawkHost Client Area after your first login. This helps you avoid fake login pages and makes accessing your account much faster.
Before You Log In
Before signing in, make sure you have the following information ready:
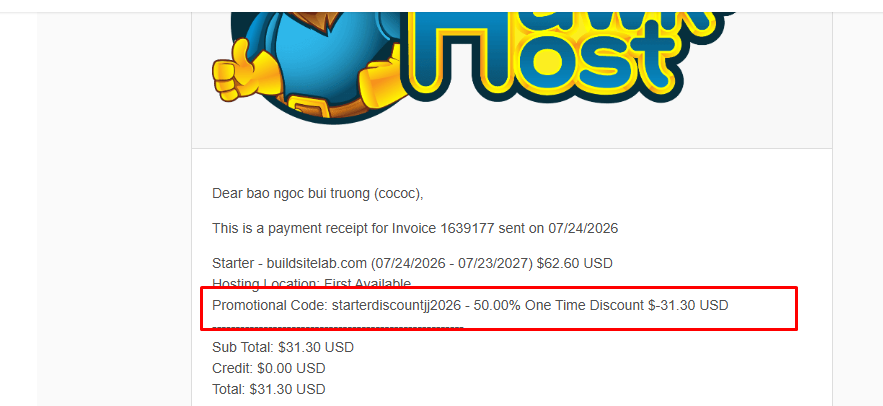
- Your HawkHost account email address
- Your account password
- A stable internet connection
- Access to your email inbox (for password recovery if needed)
If this is your first time logging in, you should also have received a Welcome Email from HawkHost after your hosting account was activated. This email usually contains:
- Client Area login link
- Hosting service details
- Server information
- cPanel login information
- Nameservers
- Important account notices
If you cannot find the email, search your inbox for “HawkHost” and also check your Spam or Junk folder.
What Is HawkHost Client Area?
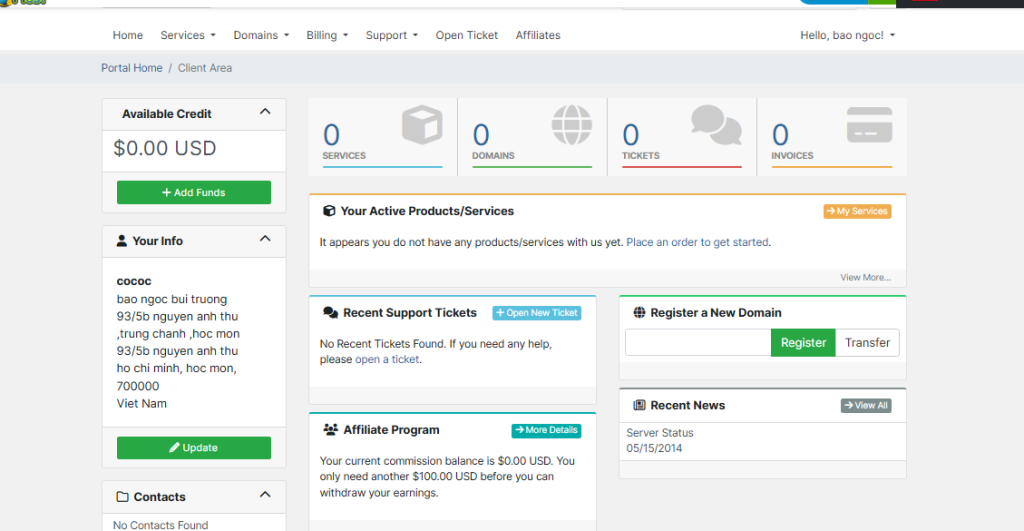
The HawkHost Client Area is your account management dashboard.
Think of it as the control center for your hosting account.
This is where you can:
- View your hosting services
- Manage invoices
- Renew hosting plans
- Register or transfer domains
- Open support tickets
- Access cPanel
- View account information
- Download invoices
- Update payment methods
Almost everything related to your account starts here.
Image Suggestion: HawkHost Client Area Login Page
HawkHost Client Area vs cPanel
One of the most common questions from beginners is:
“What’s the difference between Client Area and cPanel?”
Although they’re connected, they serve different purposes.
| Feature | Client Area | cPanel |
|---|---|---|
| Billing | ✅ | ❌ |
| Renew Hosting | ✅ | ❌ |
| Open Support Ticket | ✅ | ❌ |
| Manage Services | ✅ | ❌ |
| View Invoices | ✅ | ❌ |
| File Manager | ❌ | ✅ |
| Email Accounts | ❌ | ✅ |
| FTP Accounts | ❌ | ✅ |
| Databases | ❌ | ✅ |
| SSL Management | Limited | ✅ |
| Install WordPress | ❌ | ✅ |
| Backup Website | ❌ | ✅ |
Simply put:
Client Area = Manage your account
cPanel = Manage your website
Understanding this difference will save you a lot of confusion later.
Where Can You Find Your HawkHost Login Information?
If you’re unsure how to log in, your account details are usually available in one of these places:
Welcome Email
After purchasing hosting, HawkHost sends a welcome email containing your account information.
This is usually the easiest place to find your login details.
Order Confirmation Email
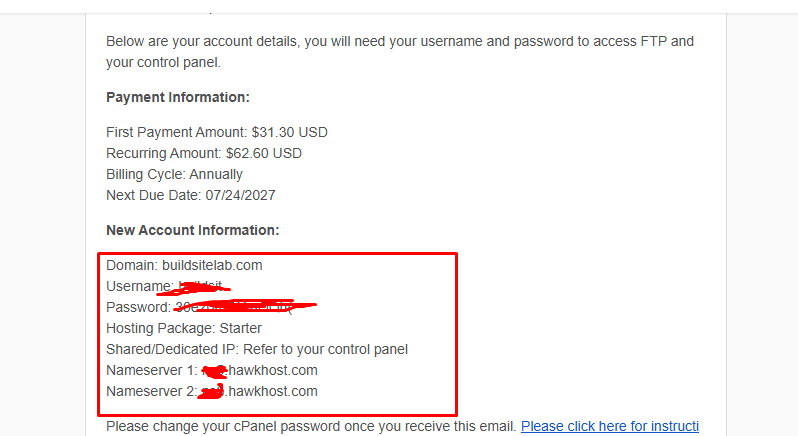
After payment, you’ll receive an order confirmation email.
Although it may not contain your password, it confirms the email address associated with your account.
Password Reset
If you’ve forgotten your password, don’t worry.
Use the Forgot Password link on the login page to create a new password.
We’ll explain this process later in this guide.
How to Log in to HawkHost Client Area
Logging in only takes a minute.
Follow these simple steps.
Step 1: Go to the HawkHost Client Area
Open your browser and visit the HawkHost Client Area login page.
Always make sure you’re using the official HawkHost website before entering your credentials.
Avoid clicking login links from suspicious emails.
Step 2: Click “Login”
Once you’re on the Client Area page, locate the Login button.
Click it to open the login form.
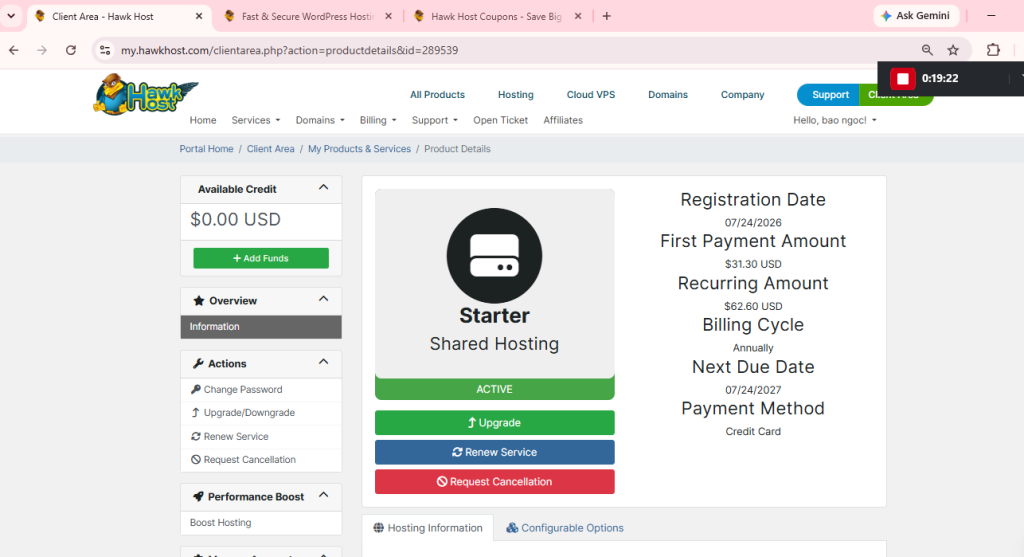
Step 3: Enter Your Email Address
Type the email address you used when purchasing your hosting account.
This must be the same email associated with your HawkHost account.
Double-check for spelling mistakes before continuing.
Step 4: Enter Your Password
Next, enter your account password.
Passwords are case-sensitive, so ensure:
- Caps Lock is off
- Keyboard language is correct
- There are no accidental spaces
If you’re using a password manager, let it fill in your credentials automatically.
Step 5: Click “Login”
Click the Login button.
If your credentials are correct, you’ll be redirected to your HawkHost Client Area dashboard.
Congratulations!
You’re now logged in.
Tips for a Secure Login
To protect your hosting account, follow these best practices:
- Use a strong, unique password.
- Never share your login credentials.
- Avoid logging in on public computers.
- Log out after using a shared device.
- Watch out for phishing emails pretending to be HawkHost.
- Save the official login page as a browser bookmark.
These simple habits can help keep your hosting account secure.
What You’ll See After Logging In
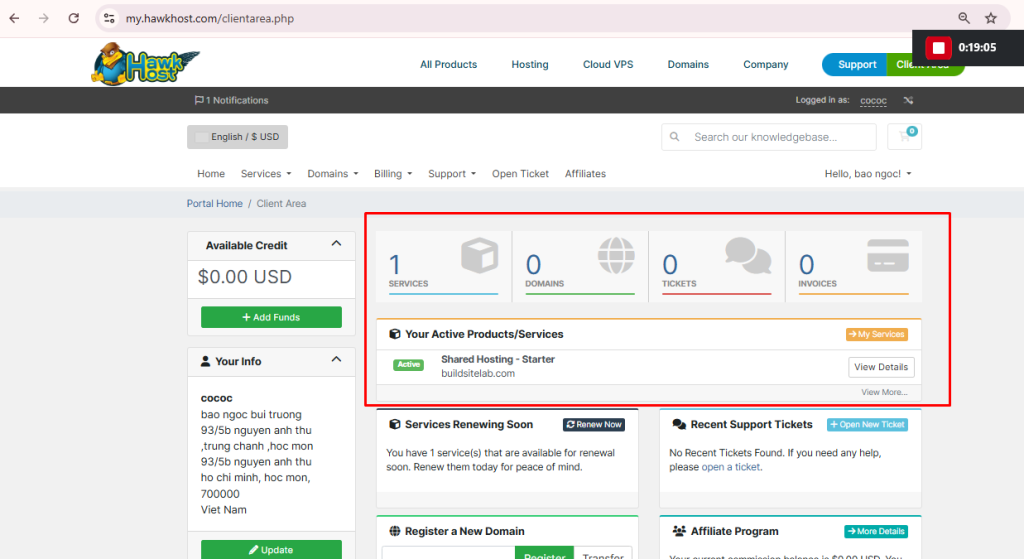
Once you’re inside the Client Area, you’ll typically find sections such as:
- My Services
- Domains
- Billing
- Support Tickets
- Announcements
- Account Details
- Security Settings
Spend a few minutes exploring the dashboard so you become familiar with where everything is located.
Common Beginner Mistakes
Many new users experience login issues because of simple mistakes, including:
- Using the wrong email address.
- Trying to log into cPanel instead of the Client Area.
- Typing the password incorrectly.
- Clicking an outdated bookmark.
- Attempting to log in before the hosting account has been activated.
Checking these items first can often solve the problem without needing to contact support.
What’s Next?
Now that you’ve successfully logged in to your HawkHost Client Area, the next step is learning how to access cPanel, where you’ll manage your website, install WordPress, create email accounts, upload files, and configure your hosting.
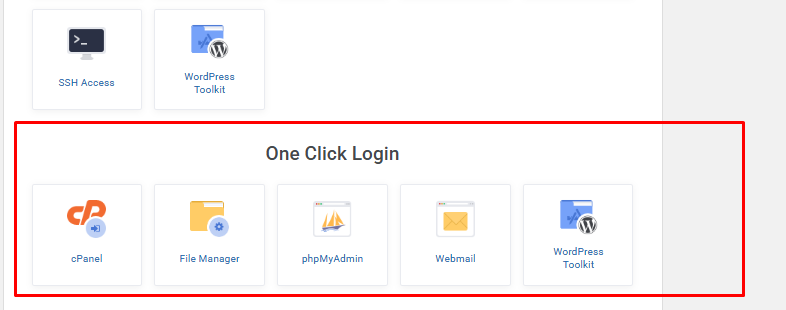
In the next section of this guide, we’ll walk through accessing cPanel, recovering your password if you’ve forgotten it, fixing common login problems, and exploring everything you can do after signing in.
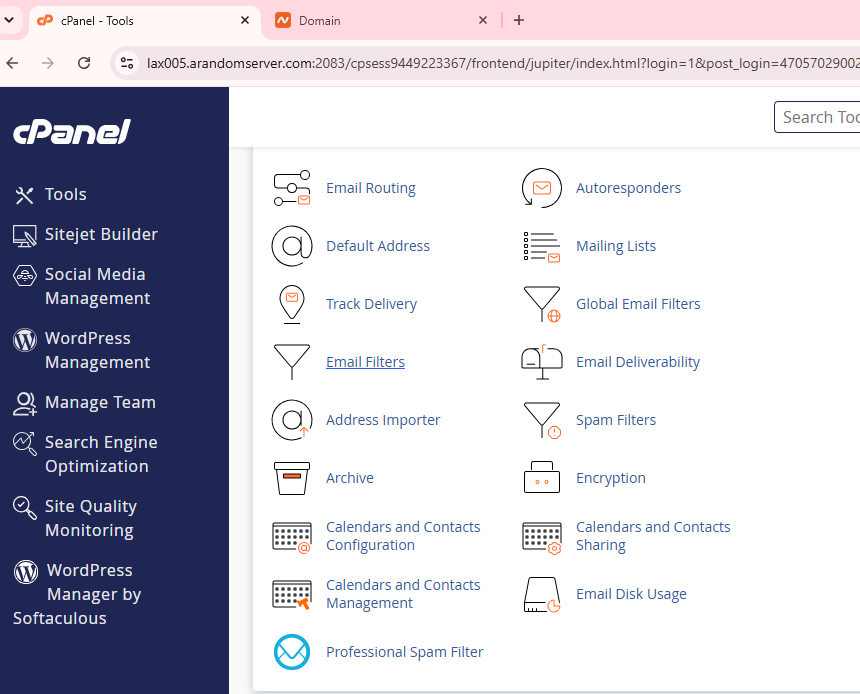
How to Access HawkHost cPanel
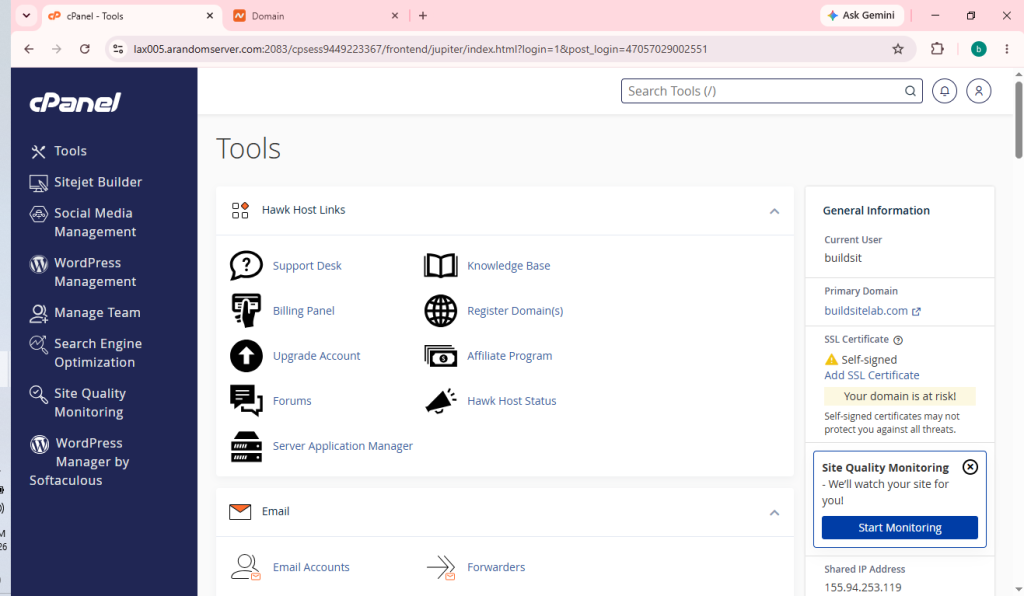
After logging into your HawkHost Client Area, the next step is accessing cPanel. While the Client Area helps you manage your hosting account, cPanel is where you’ll manage your actual website.
Inside cPanel, you can:
- Install WordPress
- Upload website files
- Create business email accounts
- Manage databases
- Create FTP accounts
- Enable SSL certificates
- Manage backups
- Configure domains and subdomains
- Monitor website resources
If you’re building a website with HawkHost, you’ll spend much more time in cPanel than in the Client Area.
Step 1: Log in to Your HawkHost Client Area
First, log in using the steps explained earlier in this guide.
Once logged in, you’ll arrive at your Client Area dashboard.
Step 2: Open “My Services”
From the dashboard, click Services or My Services.
You’ll see a list of all hosting services associated with your account.
If you only have one hosting account, you’ll normally see a single active service.
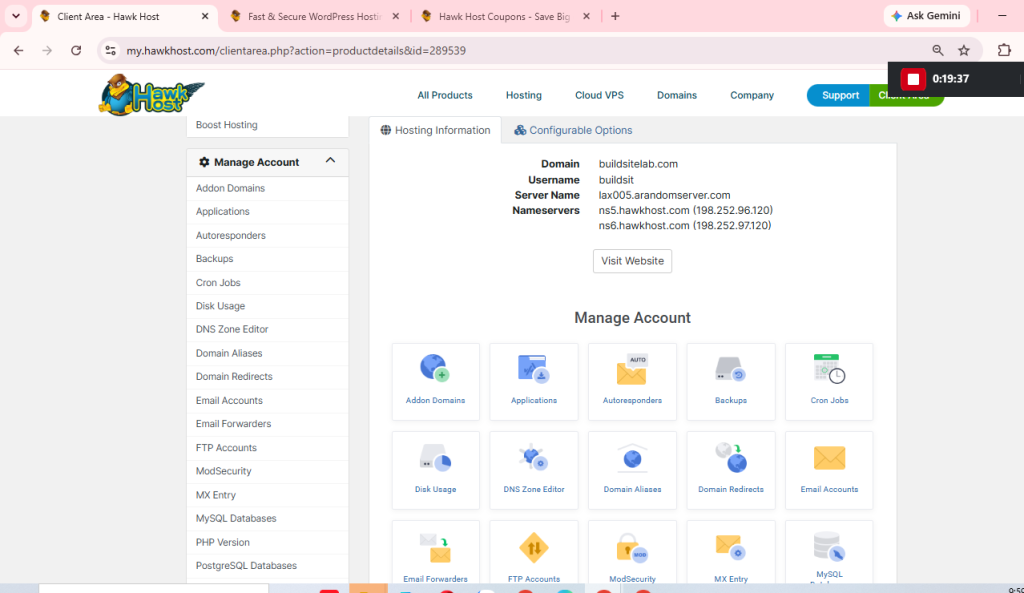
Step 3: Select Your Hosting Service
Click the hosting package you want to manage.
This opens the hosting management page where you’ll find information such as:
- Server name
- Hosting status
- Billing cycle
- Nameservers
- Disk usage
- Account details
This page also contains the shortcut for accessing cPanel.
Image Suggestion: Hosting Service Details
Step 4: Click “Login to cPanel”
Locate the Login to cPanel button.
Clicking this button automatically signs you into cPanel without requiring another password in most cases.
This is the easiest and safest method because it reduces the risk of entering incorrect credentials.
Step 5: Explore Your cPanel Dashboard
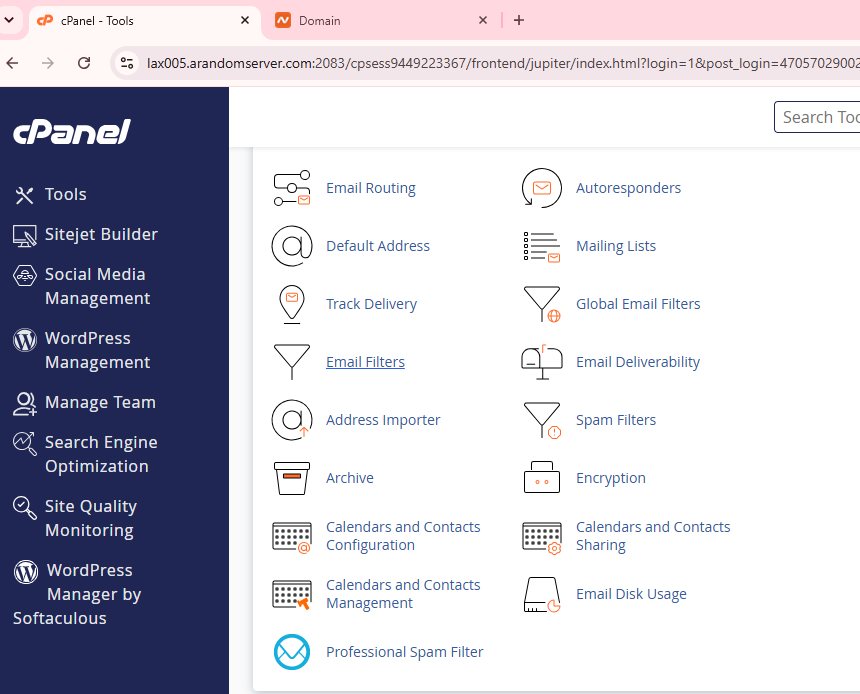
Once inside cPanel, you’ll see a dashboard with many management tools.
Some of the most commonly used sections include:
Files
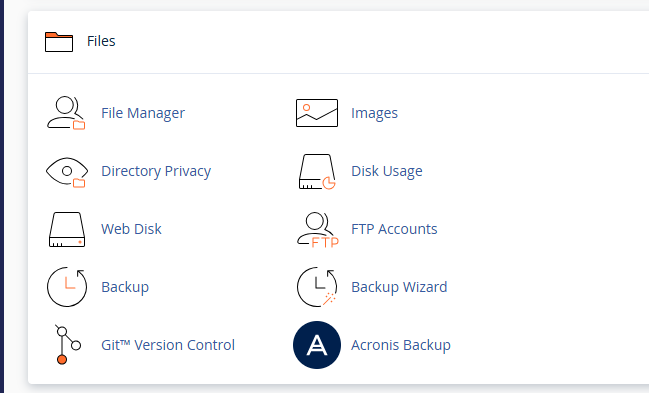
Here you can:
- Open File Manager
- Upload website files
- Compress or extract files
- Edit configuration files
Domains
Manage:
- Primary domains
- Addon domains
- Subdomains
- Redirects
Create professional email accounts such as:
Databases
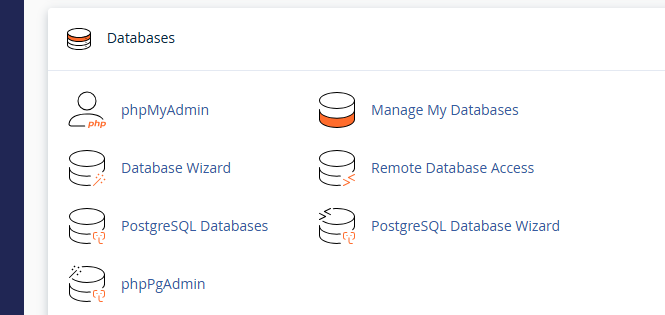
Manage:
- MySQL Databases
- phpMyAdmin
- Database Users
Software
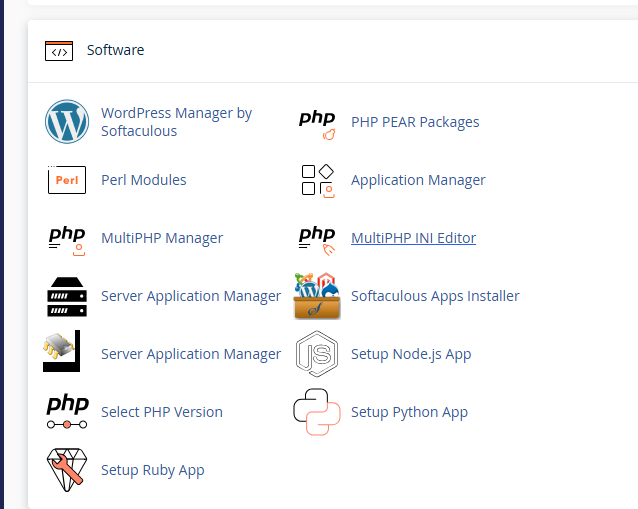
Install applications like:
- WordPress
- Joomla
- Drupal
using the one-click installer provided by HawkHost.
Security
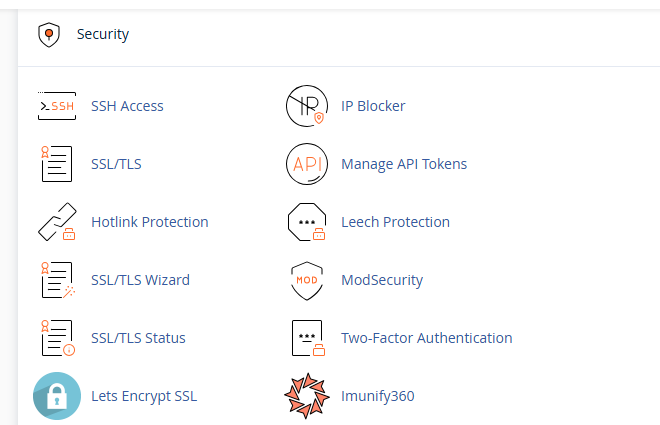
Configure:
- SSL certificates
- Password protection
- Hotlink protection
- IP blocking
Metrics
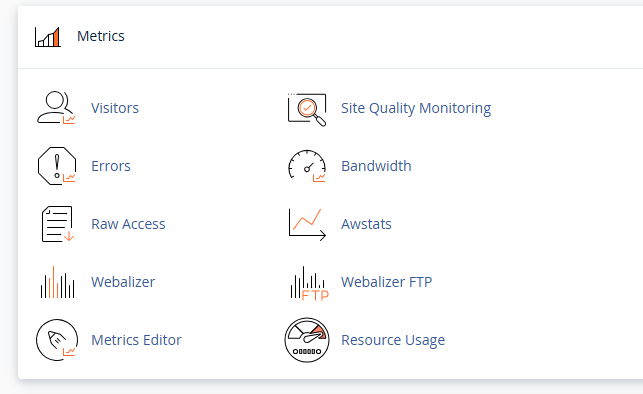
Monitor:
- Visitor statistics
- Disk usage
- Bandwidth usage
- Error logs
Forgot Your HawkHost Password?
Forgetting your password is common, especially if you haven’t logged in for several months.
Fortunately, resetting your password is straightforward.
Step 1: Open the Login Page
Go to the HawkHost Client Area login page.
Below the login form, click Forgot Password?
Step 2: Enter Your Email Address
Type the email address associated with your HawkHost account.
Double-check that you’ve entered the correct address.
Click Submit.
Step 3: Check Your Email
HawkHost will send a password reset email.
Open the message and click the password reset link.
If you don’t receive the email within a few minutes:
- Check your Spam folder.
- Check Promotions (for Gmail users).
- Search your mailbox for “HawkHost.”
- Make sure you entered the correct email address.
Step 4: Create a New Password
Choose a strong password containing:
- Uppercase letters
- Lowercase letters
- Numbers
- Special characters
Avoid using the same password you use on other websites.
Common HawkHost Login Problems
Most login issues are easy to solve.
Below are the problems users encounter most frequently.
Wrong Email Address
Many users accidentally enter a different email than the one used when purchasing hosting.
If you have multiple email accounts, verify which one is associated with HawkHost.
Incorrect Password
Passwords are case-sensitive.
Before trying again:
- Turn off Caps Lock.
- Check your keyboard layout.
- Remove any extra spaces.
If necessary, reset your password instead of repeatedly guessing.
Browser Cache Problems
Sometimes an outdated browser cache can prevent the login page from working correctly.
Try:
- Refreshing the page.
- Clearing your browser cache.
- Opening the login page in Incognito Mode.
- Using a different browser.
Wrong Login Page
A very common mistake is trying to log directly into cPanel using the Client Area credentials.
Remember:
Client Area manages your account.
cPanel manages your website.
Always start from the Client Area unless you specifically know your direct cPanel login details.
Hosting Account Not Yet Activated
If you’ve just completed your order, your hosting account may still be undergoing setup or verification.
Wait for the activation email before attempting to log in.
Expired Hosting Service
If your hosting plan has expired due to non-payment, some services may become temporarily unavailable.
Log in to the Client Area and check whether there are any unpaid invoices or expired services.
Two-Factor Authentication
If you’ve enabled two-factor authentication (2FA), you’ll also need the verification code from your authentication app or email.
Without the second verification step, you won’t be able to access your account.
What Can You Do After Logging In?
After successfully logging in, you’ll have full access to manage your hosting account and website.
Some of the most common tasks include:
Install WordPress
Use the one-click installer to launch a WordPress website in just a few minutes.
Related Guide: How to Install WordPress on HawkHost
Create Email Accounts
Create professional email addresses using your own domain.
Examples include:
Upload Your Website
Use File Manager or FTP to upload website files.
Developers often use FTP, while beginners usually prefer File Manager.
Manage SSL Certificates
Enable HTTPS by installing or renewing SSL certificates.
Most HawkHost shared hosting plans include a free SSL certificate.
Create Databases
WordPress and many other applications require MySQL databases.
These can be created directly from cPanel.
Manage Domains
You can:
- Add addon domains.
- Create subdomains.
- Configure redirects.
- Manage DNS settings.
Restore or Download Backups
Regular backups are essential for protecting your website.
Download backups periodically, even if your hosting provider already performs automatic backups.
Monitor Website Resources
Within cPanel, you can review:
- CPU usage
- Disk space
- Bandwidth consumption
- Error logs
Monitoring these resources helps you identify potential performance issues before they affect your visitors.
Security Tips for Your HawkHost Account
Keeping your account secure is just as important as being able to access it.
Follow these best practices:
- Use a unique password that you don’t reuse elsewhere.
- Store your password in a trusted password manager.
- Enable two-factor authentication if available.
- Never share your Client Area credentials with anyone.
- Always verify you’re on the official HawkHost login page before entering your password.
- Log out after using shared or public computers.
- Ignore suspicious emails asking you to “verify” your account through unknown links.
These simple precautions can significantly reduce the risk of unauthorized access.
When Should You Contact HawkHost Support?
If you’ve tried the solutions above and still can’t log in, it’s time to contact HawkHost Support.
They can help with issues such as:
- Locked accounts
- Password reset problems
- Billing verification
- Account ownership verification
- Service activation delays
- Technical login errors
When contacting support, include as much information as possible, such as your registered email address, the error message you’re seeing, and the steps you’ve already tried. This will help the support team resolve your issue more quickly.
What’s Next?
Now that you’ve learned how to access both the HawkHost Client Area and cPanel, as well as how to recover your password and troubleshoot common login problems, you’re ready to start managing your website.
In the final part of this guide, we’ll answer the most frequently asked questions about HawkHost login, summarize the key points, and recommend the next tutorials to help you build and manage your website more effectively.
Frequently Asked Questions
Below are answers to some of the most common questions users have about logging in to HawkHost.
Where Is the HawkHost Login Page?
The official HawkHost login page can be accessed through the HawkHost website by clicking Client Area or Login.
For security reasons, always use the official login page or a bookmark that you’ve previously saved. Avoid logging in through links sent in unsolicited emails or unknown websites.
Is the HawkHost Client Area the Same as cPanel?
No.
Although they are connected, they have different purposes.
Client Area is used to:
- Manage your hosting account
- View invoices
- Renew services
- Contact support
- Access cPanel
cPanel is used to:
- Install WordPress
- Upload website files
- Manage email accounts
- Create databases
- Configure SSL
- Manage domains
Think of the Client Area as your account dashboard, while cPanel is your website management dashboard.
Can I Log In Directly to cPanel?
Yes.
If you know your cPanel login URL and credentials, you can log in directly.
However, HawkHost recommends accessing cPanel through the Client Area because it’s simpler and usually logs you in automatically without requiring another password.
This is especially helpful for beginners.
Can I Log In Using My Domain Name?
Sometimes.
Depending on your hosting configuration, your domain may provide a cPanel login URL after your website has been configured correctly.
If you’re unsure, simply log in through the HawkHost Client Area and use the Login to cPanel button.
I Forgot My Password. What Should I Do?
Click Forgot Password? on the Client Area login page.
You’ll receive a password reset email.
If you don’t receive it:
- Check your Spam folder.
- Check Promotions (Gmail).
- Search your inbox for “HawkHost.”
- Confirm you’re using the correct email address.
If you still can’t reset your password, contact HawkHost Support.
Why Can’t I Log In?
There are several possible reasons:
- Incorrect email address
- Incorrect password
- Browser cache problems
- Wrong login page
- Hosting account not activated
- Expired hosting service
- Two-factor authentication issue
Review the troubleshooting section earlier in this guide before contacting support.
Can I Change My Login Email?
Yes.
You can update your account information from the Client Area after logging in.
If you no longer have access to your registered email address, you’ll need to contact HawkHost Support for identity verification.
Can I Change My Password?
Yes.
After logging in, you can change your password from your account settings.
Choose a strong password that includes uppercase letters, lowercase letters, numbers, and special characters.
Avoid reusing passwords from other websites.
Is It Safe to Save My Password in My Browser?
It’s generally safer to use a trusted password manager rather than relying on your browser to remember passwords.
If you’re using a shared computer, never allow the browser to save your login credentials.
Can I Access My Website Without Logging In?
Visitors can still access your website as long as it’s online.
However, to make changes—such as installing WordPress, uploading files, or creating email accounts—you’ll need to log in to your HawkHost account or cPanel.
What Should I Do If My Hosting Service Has Expired?
Log in to the Client Area and check your invoices.
If there’s an unpaid renewal invoice, complete the payment to reactivate your hosting service.
If you believe your account was suspended by mistake, contact HawkHost Support for assistance.
How Do I Contact HawkHost Support?
If you’re unable to solve your login issue, you can contact HawkHost Support through the Client Area by opening a support ticket.
When contacting support, include:
- Your registered email address
- Your domain name
- A description of the issue
- Any error messages you’ve received
Providing detailed information helps the support team resolve your issue more quickly.
Best Practices After Logging In
Once you’ve successfully accessed your account, it’s a good idea to complete a few important tasks.
Install WordPress
If you’re building a new website, install WordPress using the one-click installer available in cPanel.
Related Guide: → How to Install WordPress on HawkHost
Enable SSL
Make sure your website uses HTTPS by activating your SSL certificate.
SSL helps secure your website and improves visitor trust.
Create Professional Email Accounts
Instead of using a free email service, create branded email addresses such as:
Professional email addresses help build credibility for your business.
Back Up Your Website
Although HawkHost includes daily backups on many hosting plans, maintaining your own backup copies is always recommended.
Having multiple backups provides additional protection against accidental data loss.
Bookmark Important Pages
Save bookmarks for:
- HawkHost Client Area
- cPanel
- Your website dashboard
This saves time and helps ensure you always access the correct login pages.
Related HawkHost Guides
To help you get the most out of your hosting account, continue with these step-by-step tutorials:
- How to Buy HawkHost Hosting
- HawkHost Pricing Explained
- How to Access HawkHost cPanel
- How to Install WordPress on HawkHost
- How to Connect a Domain to HawkHost
- How to Create an Email Account in HawkHost
- How to Install SSL on HawkHost
- HawkHost Coupon & Promo Codes
These guides cover the most common tasks you’ll perform after setting up your hosting account.
Final Thoughts
Logging in to HawkHost is simple once you understand the difference between the Client Area and cPanel.
The Client Area is where you manage your account, billing, domains, and support requests. From there, you can access cPanel, which provides all the tools you need to manage your website, install WordPress, create email accounts, upload files, and configure hosting settings.
If you ever encounter login issues, start by checking your email address, password, browser settings, and account status. Most problems can be resolved quickly using the password reset option or by following the troubleshooting steps in this guide.
By bookmarking the official login page, using a strong password, and following basic security practices, you can keep your HawkHost account both accessible and secure.
Whether you’re launching your first website or managing multiple projects, understanding how to log in is the first step toward making the most of your hosting account.
Ready for the Next Step?
Now that you know how to log in to your HawkHost account, it’s time to start building your website.
We recommend reading these guides next:
👉 How to Access HawkHost cPanel – Learn where all the website management tools are located.
👉 How to Install WordPress on HawkHost – Launch your WordPress website in just a few minutes.
👉 How to Connect a Domain to HawkHost – Point your domain name to your new hosting account.
👉 HawkHost Pricing Explained – Compare hosting plans and choose the best option for your needs.
3 thoughts on “How to Log in to HawkHost Client Area (Step-by-Step Guide)”