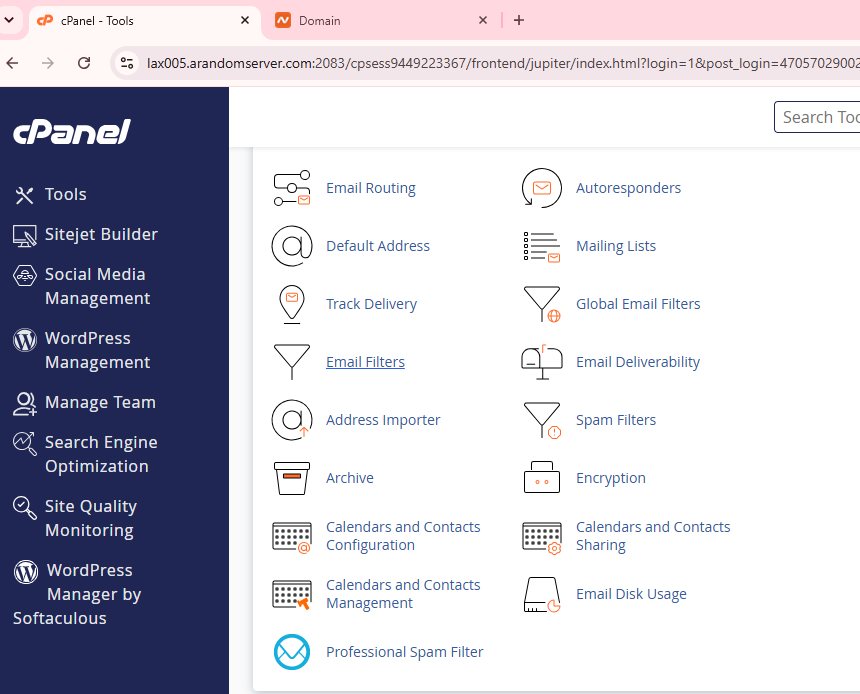
If you’ve recently purchased hosting from HawkHost, one of the first things you’ll need to learn is how to access cPanel.
cPanel is the control panel where you’ll manage almost every aspect of your hosting account. Whether you want to install WordPress, upload website files, create business email accounts, manage databases, or enable SSL, everything begins inside cPanel.
Many beginners assume they should log directly into cPanel, but HawkHost actually provides two different ways to access it. The easiest and most recommended method is through the HawkHost Client Area, while experienced users may prefer logging in through the direct cPanel URL.
In this guide, we’ll walk you through both methods step by step, explain what you can do inside cPanel, troubleshoot common login problems, and answer the most frequently asked questions.
What Is HawkHost cPanel?
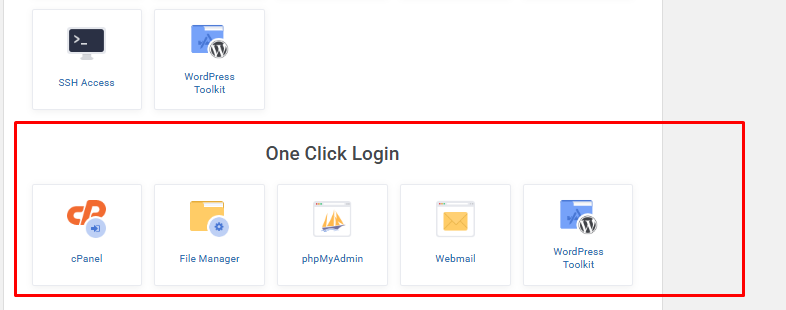
cPanel is the web-based hosting control panel included with HawkHost hosting plans.
Think of it as the dashboard where you manage everything related to your website.
Inside cPanel, you can:
- Install WordPress
- Upload website files
- Create email accounts
- Manage databases
- Create FTP accounts
- Install SSL certificates
- Manage domains and subdomains
- View website statistics
- Download or restore backups
- Configure PHP settings
Unlike the HawkHost Client Area, which is used for billing, account management, and support, cPanel focuses entirely on website management.
Related Guide: → How to Log in to HawkHost Client Area
Before You Access cPanel
Before trying to access cPanel, make sure you have completed the following:
✅ Purchased a HawkHost hosting plan.
✅ Received your hosting activation email.
✅ Created your HawkHost Client Area account.
✅ Have your registered email address and password ready.
If you’ve just signed up and haven’t received your welcome email yet, wait until your hosting account has been activated before attempting to log in.
Related Guide: → How to Buy HawkHost Hosting
Method 1: Access cPanel from HawkHost Client Area ⭐ (Recommended)
This is the easiest and safest method, especially for beginners.
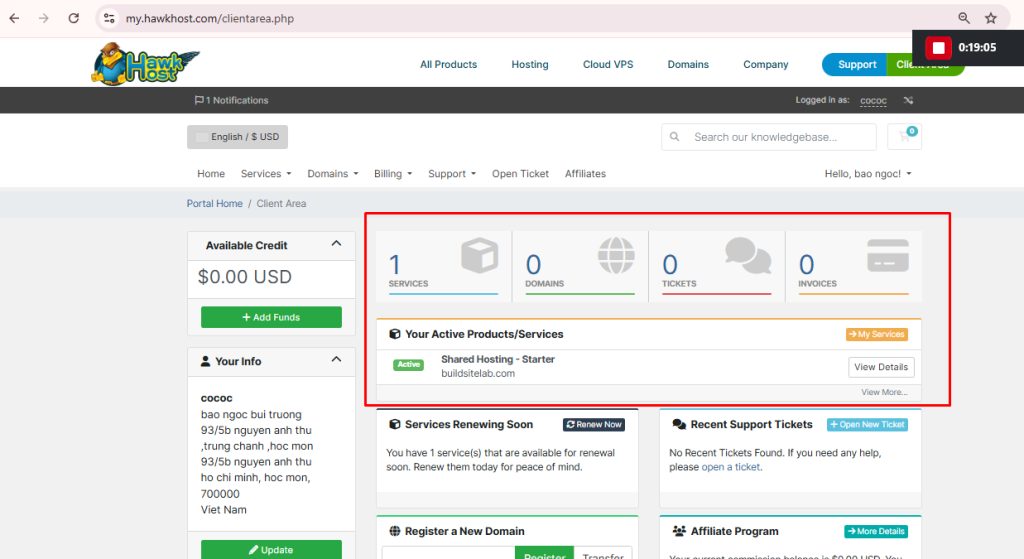
Instead of remembering another username or password, HawkHost automatically logs you into cPanel through your Client Area.
Step 1: Log in to HawkHost Client Area
Visit the HawkHost Client Area and sign in using your registered email address and password.
If you’ve forgotten your password, use the Forgot Password option before continuing.
Step 2: Open “My Services”
After logging in, you’ll arrive at your account dashboard.
Click Services or My Services from the navigation menu.
This section displays every hosting service associated with your account.
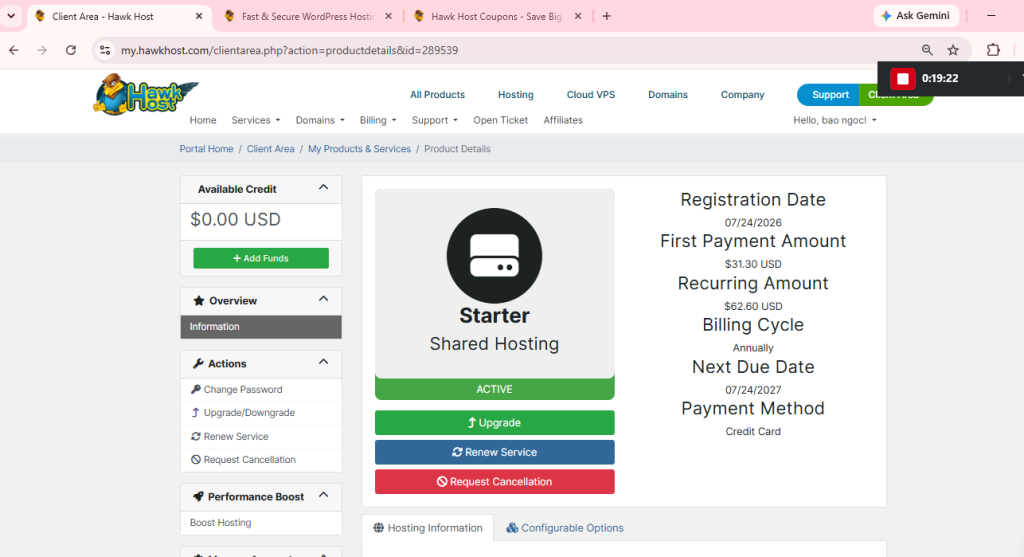
Step 3: Select Your Hosting Service
Click the hosting account you want to manage.
You’ll now see important information about your hosting package, including:
- Hosting status
- Server hostname
- Billing information
- Nameservers
- Disk usage
- Service details
On this page, you’ll also find the shortcut to cPanel.
Step 4: Click “Login to cPanel”
Locate the Login to cPanel button.
Clicking this button will automatically authenticate you and open your cPanel dashboard without asking for another password.
This method is recommended because it’s fast, secure, and avoids login errors.
Step 5: You’re Now Inside cPanel
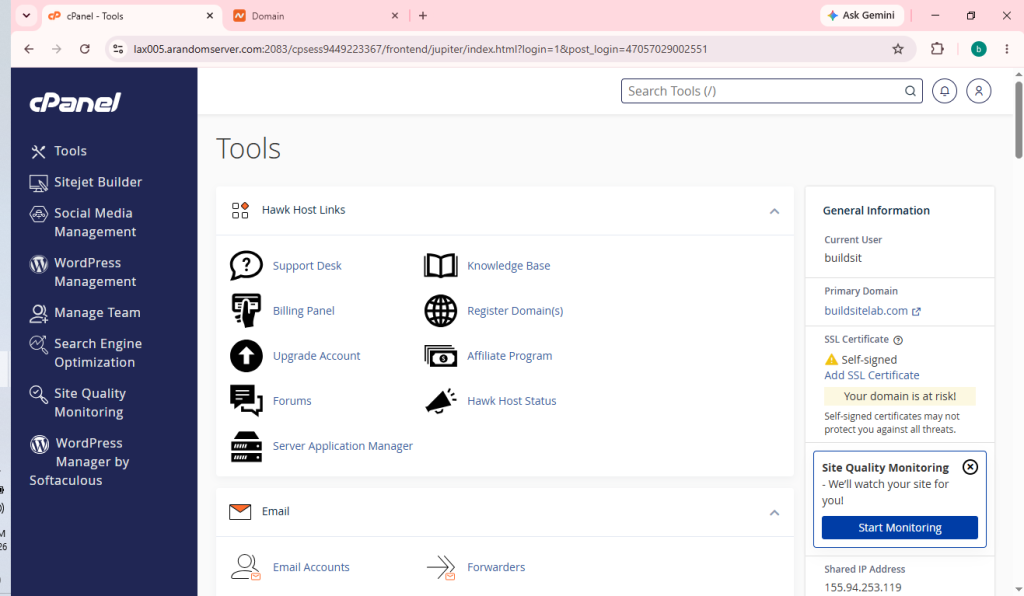
Congratulations!
You’ve successfully accessed your HawkHost cPanel.
Depending on your hosting package, you’ll see sections such as:
- Files
- Databases
- Domains
- Software
- Security
- Metrics
- Advanced Settings
Take a few minutes to explore the dashboard and become familiar with the available tools.
Method 2: Access cPanel Using the Direct Login URL
Advanced users may prefer logging directly into cPanel.
Common login URLs include:
https://yourdomain.com:2083or
https://serverhostname:2083The exact server hostname can be found in your HawkHost welcome email or within your Client Area.
When Should You Use Direct Login?
Direct cPanel login is useful if:
- You already know your cPanel username and password.
- Your Client Area is temporarily unavailable.
- You manage multiple hosting accounts.
- You frequently access cPanel for development work.
For beginners, however, the Client Area login method remains the easiest and safest option.
Understanding the cPanel Dashboard
When you first enter cPanel, you may notice a large number of icons and menus. While it can seem overwhelming, most website owners only use a handful of these tools regularly.
Here are the most important sections you’ll use.
File Manager
The File Manager lets you manage all the files on your hosting account directly from your browser.
With File Manager, you can:
- Upload files
- Delete files
- Rename files
- Edit configuration files
- Compress or extract ZIP archives
- Change file permissions
For many beginners, File Manager is easier than using FTP software.
Related Guide: → How to Use File Manager in HawkHost
FTP Accounts
FTP (File Transfer Protocol) allows you to upload and manage website files using desktop applications like FileZilla.
Inside cPanel, you can:
- Create FTP accounts
- Change FTP passwords
- Delete FTP users
- Restrict directory access
Related Guide: → How to Create an FTP Account
Email Accounts
One of the biggest advantages of hosting with HawkHost is the ability to create professional email addresses.
Examples include:
Within cPanel, you can:
- Create new email accounts
- Change passwords
- Configure webmail
- Set mailbox storage limits
- Forward emails
Related Guide: → How to Create an Email Account in HawkHost
Domains
The Domains section allows you to manage all domain-related settings.
You can:
- Add addon domains
- Create subdomains
- Configure redirects
- Manage aliases
- Update DNS records
Related Guide: → How to Create an Addon Domain
SSL/TLS
SSL certificates secure your website using HTTPS.
Most HawkHost shared hosting plans include a free SSL certificate.
Inside cPanel, you can:
- Install SSL
- Renew certificates
- View certificate status
Related Guide: → How to Install Free SSL on HawkHost
Backup
Backups are essential for protecting your website.
Using the Backup tools, you can:
- Download website backups
- Restore backups
- Export databases
- Save email backups
Even if HawkHost performs automatic backups, it’s still a good idea to keep your own copies.
Related Guide: → How to Back Up Your Website
WordPress
Most HawkHost customers use WordPress.
Through the Software Installer, you can install WordPress in just a few clicks without uploading any files manually.
Related Guide: → How to Install WordPress on HawkHost
Common Problems Accessing HawkHost cPanel
Although accessing cPanel is usually straightforward, you may occasionally run into issues.
Login Button Missing
If you can’t find the Login to cPanel button:
- Make sure your hosting account is active.
- Refresh the Client Area.
- Clear your browser cache.
- Try another browser.
Invalid Username or Password
Double-check that you’re using the correct credentials.
Remember that your cPanel username and password may be different from your Client Area login details if you’re accessing cPanel directly.
Too Many Redirects
This browser error is usually caused by corrupted cookies or cached data.
Try:
- Clearing browser cookies.
- Opening an Incognito window.
- Using another browser.
SSL Warning
If your browser displays an SSL warning when accessing cPanel through a direct URL, verify that you’re using the correct secure address.
Whenever possible, log in through the Client Area instead.
cPanel Won’t Load
If cPanel doesn’t open:
- Check your internet connection.
- Verify your hosting account is active.
- Disable browser extensions temporarily.
- Contact HawkHost Support if the issue persists.
Security Tips
Protecting your hosting account is just as important as knowing how to access it.
Follow these best practices:
- Use a strong password.
- Enable two-factor authentication if available.
- Never share your login credentials.
- Bookmark the official Client Area.
- Log out after using shared computers.
- Keep your browser updated.
These simple precautions can help prevent unauthorized access.
Frequently Asked Questions
Is HawkHost cPanel Free?
Yes.
cPanel is included with HawkHost shared hosting plans at no additional cost.
Can I Access cPanel Without Logging into the Client Area?
Yes.
If you know your direct cPanel login URL and credentials, you can log in without using the Client Area.
However, HawkHost recommends accessing cPanel through the Client Area whenever possible.
What Is Port 2083?
Port 2083 is the secure HTTPS port used for cPanel.
A typical secure cPanel login address looks like this:
https://yourdomain.com:2083Why Can’t I Access cPanel?
Common reasons include:
- Incorrect login credentials.
- Expired hosting account.
- Browser cache issues.
- Incorrect login URL.
- Temporary server maintenance.
Where Is File Manager?
After logging into cPanel, scroll to the Files section and click File Manager.
This is one of the most frequently used tools in cPanel.
Final Thoughts
Accessing HawkHost cPanel is simple once you understand the two available methods.
For most users—especially beginners—the easiest approach is to log in through the HawkHost Client Area and click the Login to cPanel button. This method is secure, convenient, and eliminates the need to remember separate cPanel credentials.
Once inside cPanel, you’ll have everything you need to build and manage your website, from installing WordPress and creating email accounts to managing files, databases, backups, and SSL certificates.
As you become more familiar with cPanel, you’ll discover that it serves as the central hub for nearly every aspect of website management.
Next Steps
Now that you know how to access HawkHost cPanel, you’re ready to start building your website.
Continue with these beginner-friendly guides:
- How to Install WordPress on HawkHost
- How to Create an Email Account in HawkHost
- How to Connect a Domain to HawkHost
- How to Install Free SSL on HawkHost
- How to Back Up Your Website
- How to Use File Manager in HawkHost
These tutorials will help you make the most of your HawkHost hosting account and confidently manage your website as it grows.
7 thoughts on “How to Access HawkHost cPanel (Step-by-Step Guide)”